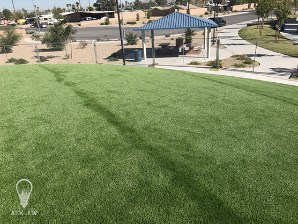
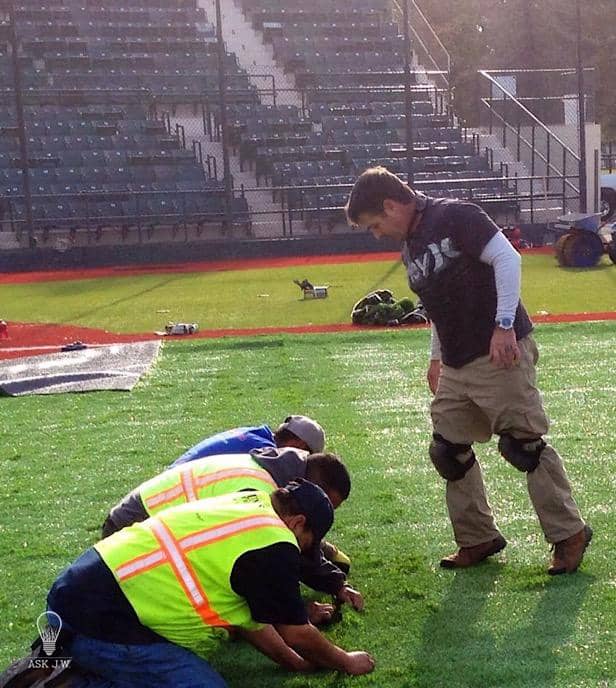
The worst thing you can do is overwork a synthetic turf seam. Synthetic turf seams, when overworked, will appear as a different shade of green than the rest of the turf in the sunlight. For example, when a sample of turf is placed with its leaning fibers facing toward the focal point, a darker, deeper color will occur versus when the fibers are being placed away from the focal point. This is due to the angle of the fiber in conjunction with the direction of the sunlight. If you witness a shiny surface in areas of your installs, this means the turf fibers are lying flat and allowing light to shine off their surface. When it comes to installing and blending two sections of turf seams together, it is crucial for you to understand how manipulation and light can have an effect upon your installations. This month’s ASK JW will explain why fiber manipulation can wreak havoc on your installs.
Manipulation of fibers: when friction is placed upon the turf fibers to change its angle and/or direction.
When it comes to integrating seams, as a synthetic turf installer you have the option to either pass on the work to another qualified installer or learn not to manipulate its fibers. It can be easy installing sections of turf without seams, but to conquer seam perfection takes concern, care, and craftsmanship.
Embeds & Manipulation
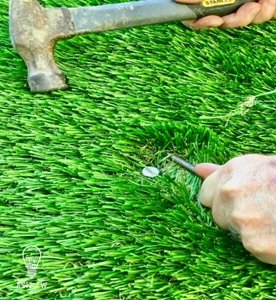
The first signs of manipulation are embeds. Embeds can be nails, spikes, staples, or anything else that you decide to insert into the synthetic turf to secure it. Embeds may cause manipulation and visible seams.
NAILING SEAMS WITHOUT GLUE: Securing the seam with nails or staples could make the seam more visible due to manipulation. I highly recommend using seam tape and a glue/adhesive method. Using this method, you never have to worry about the seam being manipulated or damaged by nails or staples. Always remember: The larger the head of the nail, the more visible the seam will be. If you decide to use embeds, make sure to spread the fibers to allow the head of the nail to pass through the fibers to the base of turf backing. Otherwise, you’ll create divots by trapping the fibers with the nail heads. If the installer’s preference is securing the seam with spikes, staples, or nails down the seam edge, I recommend doing this in a stitch pattern to minimize its visibility and manipulation.
Too many nails or staples that are placed at the seam will manipulate the fibers and cause the seam to be noticeable. I do not recommend ever using embeds at the seamline. Instead, use seaming tape and glue which will not affect the fibers. If you decide that you are going to use nails to secure the seam, I recommend using a nail that has a head the same size as the gauge of the turf you are installing. This will allow the nail to manage its way down in between the gauges. For example, if the gauge is 3/8” wide then you should never use a nail that has a head larger than the gauge width. If the nails are placed too far in from the seam, this will cause the edge of the seam to flip up and will make the seam visible. If the nails are placed too close to the edge of the seam, this will allow too much infill at the seam line and will be noticeable. Therefore, I recommend using the seam tape and glue method to avoid manipulating the turf.
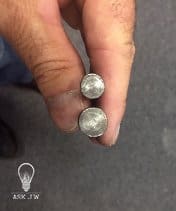
If you are using staples, you must understand the subgrade conditions. Using staples in hard, rocky areas can cause the staple to bend outwards and cause the seam to separate. (Notice the pictures above of a staple width after being placed in these types of conditions)
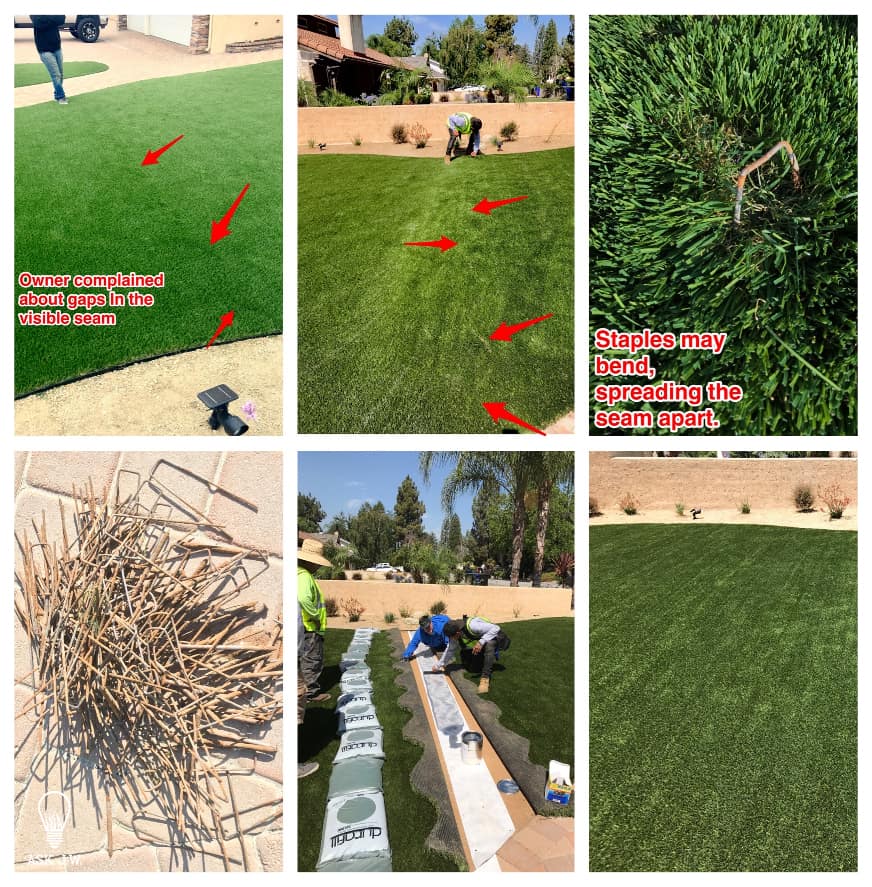
The images to the left are from an install that looked great until they installed the seam. This contractor went out of his way to “superseam” the seam, but he didn’t realize manipulation would ruin his day. Staples were used instead of seam tape and glue. Do you notice how the staple has widened? Most of the staples bent while they were being driven into the compacted soil. When this happens, it causes the seam to spread apart and become visible. I assured the contractor and the homeowner that we could remove all the staples and place seaming tape and glue to secure the seams without any manipulation. As you can see, it turned out beautiful and everyone was satisfied with the outcome.
Why chance manipulating and trapping fibers with embeds?
Manipulation by Abrasion
Over-brushing of fibers is the most recognized problem when it comes to visible seams. Installers don’t understand that aggressively abrading the turf fibers to hide seams will cause the seam to become different in color due to the reflection of light off of each fiber. Synthetic turf fibers are similar to plastic in many ways. They are flexible, strong and can withstand decades of seasons, but when the outer surface of the fiber is abraded it will receive light differently than other fibers that haven’t been manipulated. It will also become very visible when they are matted or bent flat.
When fibers are bent and lay flat, most will likely show a lighter color due to light reflection. When installing seams, body weight alone will reveal a visible seam in just a short period of time (see above, center picture). I see this a lot in overworked seams, usually caused by shoes, knees, and bags of infill mashing the fibers flat until they are no longer vertical. When this mashing consistently occurs, it creates matting. Matted fibers that stay this way may lose memory and be difficult to brush back to their original, vertical position.
Matting of synthetic turf is common in areas with high foot traffic or heavy, resting objects which may bend the fibers flat. Take this into consideration when working on top of a seam.
Cutting Mistakes, Overlapping, & Gaps
Cutting fibers at the seam fibers will cause the seam to be visible. When cutting the gauge for a seam, you must be careful not to cut any fibers. Making these mistakes causes more infill to lay within the seam line and you will have to reinstall the seam. If the distance between the fiber rows is too wide, not only will the seam be visible, but it will also become very noticeable once you place your infill materials. I recommend always installing seams as per the manufacturer’s gauge width – fiber row to fiber row. Do not align your seams with the backing. ALWAYS FIBER ROW TO FIBER ROW!
If you want to become a craftsman in the synthetic turf industry, I strongly recommend acknowledging how you physically work on seams. Working on top of seams and disregarding the fiber’s integrity will cause visible seams.
Manipulation can be present in many forms. I strongly recommend positioning your body, knees, and other materials away from the seam’s center, and do not try to camouflage and manipulate the seam line by over-brushing. This will only make it worse.
JW
Be sure to read next month’s Part 3 of Synthetic Turf Seam Integration where ASK JW will share tips and tricks to become a craftsman at synthetic turf seams.
For more information regarding seam integration, contact JW at askjw@sgwcorp.com or call (888) 846-3598
Other Topics:

About SGW
Learn more about SGW

Certifications
IPEMA, Lead-Free, and CAD Details

Warranties
Our Industry Leading Warranties

Ask an expert
See if we’ve answered your questions

Media
Our tried and true steps for installation

Blog
Learn about our turf in depth
Here to help
Our Commitment
We are committed to providing the best artificial turf products at competitive prices. Our warehouse carries the most advanced synthetic grass products available, engineered to look and feel like real grass. Every turf product is made with high quality materials that are safe for everyone, especially children and pets.

Industry Leaders
SGW San Diego has always stood out among competitors, offering new products with the latest technology.

Service Oriented
The only thing better than our grass is our customer service. Our staff is committed to providing the best experience possible for our clients.

Quality Driven
At SGW San Diego we only offer products that maintains a high standard of quality. Backed by up to a 15 year warranty, the best in the industry.


